Friday, May 28, 2010

Green Tea Heaven


I went down to Escondido with some friends the other day. I know some of you are thinking -- where the heck is Escondido? Not to hate on that city, but really, it's like the setting of a Friday the 13th movie. There really isn't much out there. Maybe Westminster Seminary had a monastic place in mind for their future students. NO FUN ALLOWED! (just kidding.)

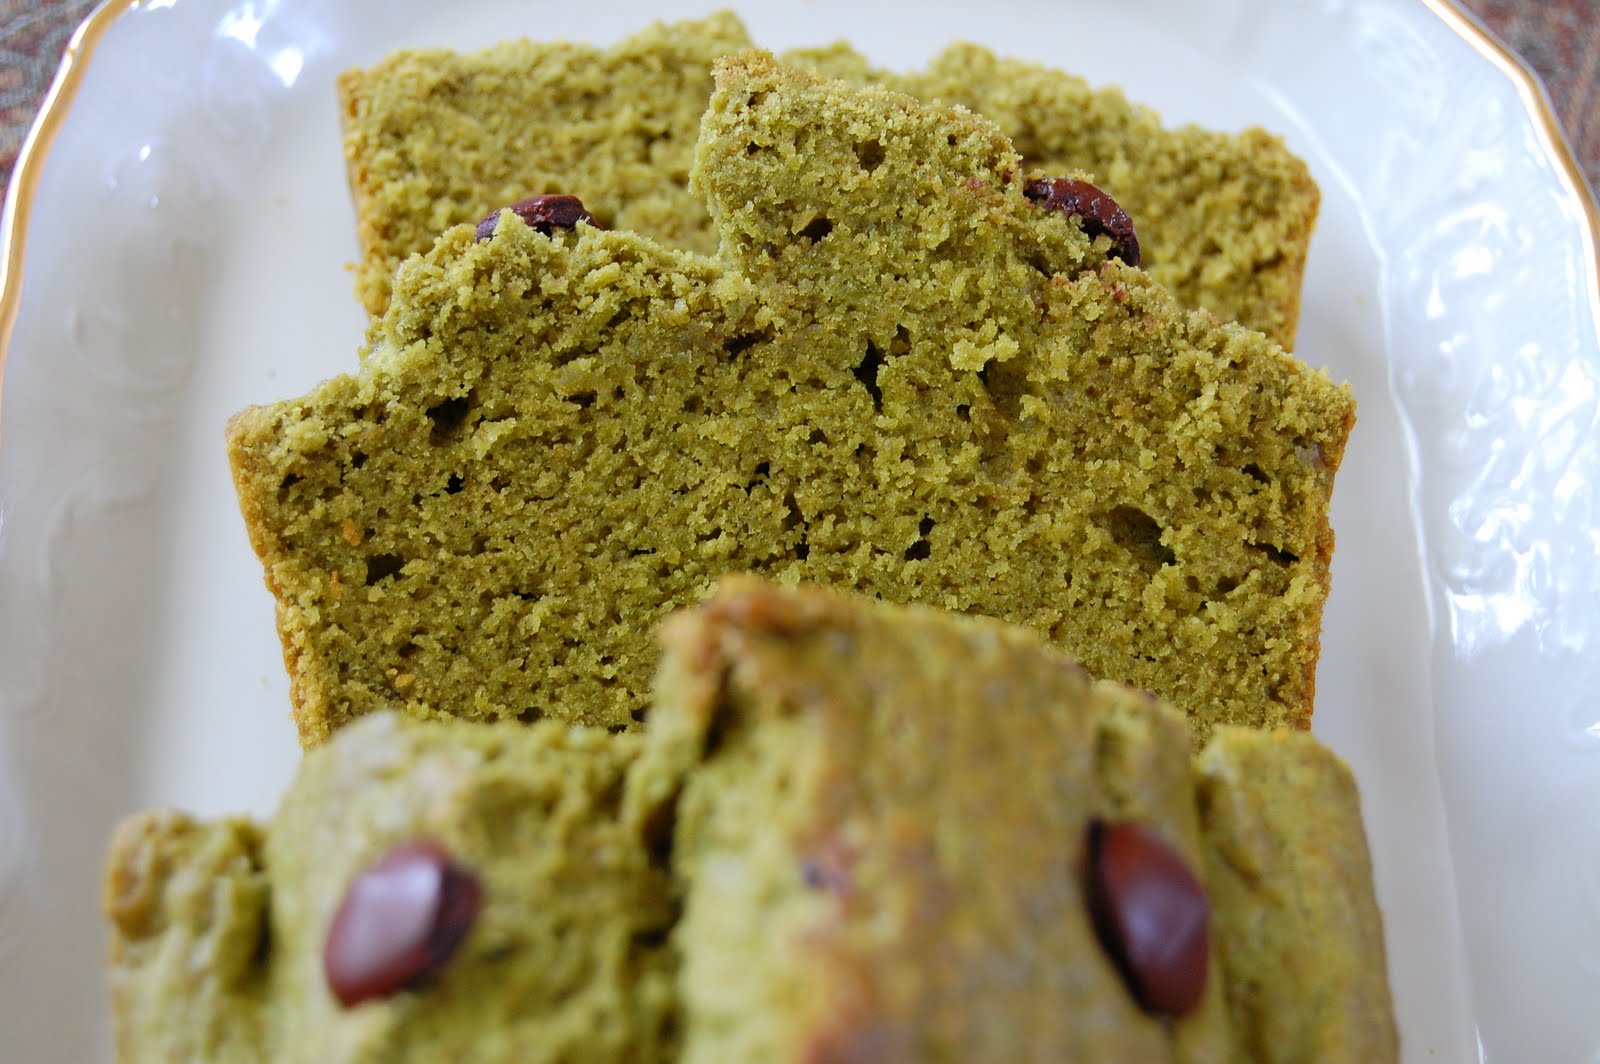
Anyhoo, some friends down there asked me to make some green tea cupcakes for them, but I ran out of green tea powder long ago. Luckily, I was also out of butter and needed to go out to the market anyways, or else I would've made something else and this entry would cease to exist. I went to 99 Ranch and couldn't believe how cheap it was! With so much green tea powder, I was beside myself, like a giddy little school-girl whose crush just acknowledged her. Okay, maybe not that excited. Sorry to say I don't have any pictures of the cupcakes (which came out alright...don't think I'll share the recipe because I'm looking for a better one), but I did make a green tea loaf today that is absolutely delicious! Soft, moist, not too sweet, and "earthy" -- this loaf is definitely a keeper.


It's perfect for those who don't like desserts that are sweet, sweet, SWEET. Here's the recipe, taken from Milk and Honey Cafe:

Ingredients

2 cups bleached all-purpose four
2 tablespoons green tea powder
2 teaspoons baking powder
2 sticks soft unsalted butter (I used I can't believe it's not butter)
2 cups confectioners' sugar (I used sugar substitute)
5 large eggs, separated
Pinch of salt

Directions

1. Butter a 9 x 5 x 3-inch loaf pan and line with buttered parchment or wax paper—cut to fit. Set a rack in the middle level of the oven and preheat to 325F. Combine the flour, green tea and baking powder and stir well to mix.
2. Cream butter and confectioners sugar in bowl of mixer with paddle attachment and beat for about 3 minutes or until light. Beat in the egg yolks one at a time, beating well after each addition and scraping bowl and beater occasionally with a rubber spatula. Remove the bowl from the mixer and fold in the flour mixture by hand, with a rubber spatula.
3. Pour the egg whites and salt into a clean, dry mixer bowl. Place on mixer with whisk attachment and whip whites on medium speed until white and opaque and just beginning to hold their shape. Increase speed slightly and continue whipping egg whites until they hold a soft peak.
4. Remove bowl from mixer and quickly scrape whites from bowl onto batter in other bowl. Use a large rubber spatula to fold the egg whites into the batter, folding just until no streaks of white remain.
5. Scrape the batter into prepared pans and smooth the top. I added some chocolate chips on top for decoration. Bake the cakes for about 45 minutes (35-40 minutes for mini loaf pans) or until it is well risen and a toothpick inserted in the center emerges dry. Cool the cakes in the pans on a rack for 10 minutes, then un-mold and cool it completely.


I'm taking requests for the next baking adventure. :)

Monday, May 24, 2010

Chocolate Chip Cookies + Healthy = BFF's


Can it be true then? A chocolate chip cookie that is...(dare I say it??) quite healthy and delicious?! I know...I KNOW. This can't be true.

Last week was a disaster at my house. Who knew how crippling a broken fridge could be until it actually happened. We ended up trying to eat most of the perishable veggies, fruits, meats, and drinks. However, I couldn't get myself to eat all those creamy ice cream tubs that we have collected over the past several months (thanks to church people who seem to bring ice cream every time they come over). Seeing as I didn't want to become Augustus Gloop anytime soon, we sadly had to toss all our ice cream. *GASP* R.I.P Ben & Jerry's, Haagen Daz, and Skinny Cow.

So there I was, standing in the kitchen. The last stick of I can't believe it's not butter (which, by the way, really does taste like butter) was in my fridge calling out to be used. Therefore, I decided to make a dessert that I could eat without killing the 3 miles of running I had just ran prior to this fiasco (secretly, I ran 1 mile and walked 2).

Here we are: The World's Healthiest Chocolate Chip Cookie. It's soft, it's good, and it's been tested! They are awesome right out of the oven and with a tall glass of cold milk.
Taken from some healthy person's blog:

Oatmeal Chocolate Chip Cookies

1/2 cup brown sugar

1/2 cup granulated sugar (I used Splenda)

1/2 cup butter, softened to room temperature (I used the substitute)

1 egg

1 tsp vanilla

1 TBL milk (nonfat)

1 cup whole wheat flour (make sure it's 100%)

1/2 tsp baking soda

1/2 tsp baking powder

1/2 tsp salt

1/2 tsp cinnamon

a dash of nutmeg

1 cup uncooked quick rolled oats

3/4 cup semisweet chocolate chips (I used 60% bittersweet chocolate)

3/4 cup chopped walnuts

Directions:

- Preheat the oven to 350 degrees. Combine the sugars in an electric mixer. Cream the sugars with the softened butter. Add in the egg, vanilla, and milk. Cream until smooth. In a separate bowl, sift together the flour, soda, baking powder, salt, cinnamon, and nutmeg (if using). Add slowly to the wet mixture until incorporated. Once smooth, stir in the oats, chocolate chips, and walnuts. Using a teaspoon or a small ice cream/cookie scoop, drop rounded teaspoons about 2 inches apart on a cookie sheet lined with parchment paper. Bake for 12-15 minutes or until lightly golden around the edges. Makes around 2 dozen (depending on the size of your cookies).

Friday, May 14, 2010

The ultimate chocolate cake


I did it! I finally found a chocolate cake that I love. This will now and forever be my go-to chocolate cake for any occasion! And that's saying a lot! In the past, I have only found mediocre recipes that made even more mediocre cakes -- dull, lifeless, slightly dry pieces of flour and chocolate. Gross.


Many thanks to the worker at Williams and Sonoma who passed on this recipe to me. Her rave reviews about this cake made me really curious. In her exact words, "This is the best chocolate cake in the world!" Now, I don't know if it's the best chocolate cake in the WORLD, but it's pretty darn good. :) The secret is the mayo! Sounds strange, but it works. Apparently, it provides the moist texture that makes this cake so darn yummy.


This is any girl's chocolate dream and will satisfy any craving!


Ingredients
cake

* 2 ounces bittersweet chocolate (do not exceed 61% cacao), chopped
* 2/3 cup unsweetened cocoa powder
* 1 3/4 cups boiling water
* 2 3/4 cups all purpose flour
* 1 1/4 teaspoons baking soda
* 1/4 teaspoon baking powder
* 1 cup sugar
* 1 cup (packed) dark brown sugar
* 1 1/3 cups mayonnaise (do not use reduced-fat or fat-free)
* 2 large eggs
* 1 teaspoon vanilla extract

frosting

* 10 ounces bittersweet chocolate (do not exceed 61% cacao), chopped
* 1 1/2 cups (3 sticks) unsalted butter, room temperature
* 3 cups powdered sugar
* 1 tablespoon vanilla extract

special equipment

* Three 8-inch-diameter cake pans with 1 1/2-inch-high sides

Preparation
cake

*Preheat oven to 350°F. Butter and flour three 8-inch-diameter cake pans with 1 1/2-inch-high sides. Combine chopped chocolate and cocoa powder in medium metal bowl. Add 13/4 cups boiling water and whisk until chocolate is melted and mixture is smooth.
*Sift flour, baking soda, and baking powder into another medium bowl. Using electric mixer, beat both sugars and mayonnaise in large bowl until well blended, 2 to 3 minutes. Add eggs 1 at a time, beating until well blended after each addition. Beat in vanilla. Add flour mixture in 4 additions alternately with chocolate mixture in 3 additions, beating until blended after each addition and occasionally scraping down sides of bowl. Divide batter among prepared cake pans (about 2 1/3 cups for each).
*Bake cakes until tester inserted into center comes out clean, 30 to 32 minutes. Cool cakes in pans on racks 20 minutes.
*Run small knife around sides of cakes to loosen. Carefully invert cakes onto racks and let cool completely.

FROSTING

*Place chopped chocolate in medium metal bowl; set bowl over saucepan of simmering water and stir until chocolate is melted and smooth. Carefully remove bowl from over water; let melted chocolate cool until lukewarm, stirring occasionally.
*Using electric mixer, beat butter in large bowl until smooth and creamy. Sift powdered sugar over butter and beat until well blended, about 2 minutes. Beat in vanilla. Add melted chocolate and beat until well blended and smooth, occasionally scraping down sides of bowl.
*Place 1 cake layer on platter. Spread 3/4 cup frosting over top of cake layer to edges. Top with second cake layer; spread 3/4 cup frosting over. Top with third cake layer. Spread remaining frosting decoratively over top and sides of cake. DO AHEAD Can be made 1 day ahead. Cover with cake dome and let stand at room temperature.

Tuesday, May 4, 2010

White Chocolate Raspberry Cheesecake


There are two desserts at the top of my Favorite Desserts of all Time list:
1. Chocolate Cake (my next baking adventure)
2. Cheesecake

Now that I have improved my techniques with cheesecake, I felt it necessary to start mixing up the flavors a little. First up: White Chocolate Raspberry Cheesecake.

I think this is my favorite cheesecake at the Cheesecake Factory, so how can I NOT try and imitate it? I used low fat cheesecake (although the recipe says not to) and Splenda so lower the calorie count and fat of this dessert. I'm all about making my desserts diabetic friendly, although nobody around me is diabetic. Eh...who doesn't like a semi-guilt-free dessert?

So here we go...


I noticed that Oreos are sweet enough that you don't need to add any sugar to the crust, only melted butter. I replaced the sugar with Splenda, and threw the frozen raspberries in the blender with some sugar and water to quicken up the prep time. Just run the pureed raspberries through a sieve before heating it up. Also, I needed to bake my cheesecake for an extra 20 minutes or so...weird that the timing was so off from the recipe.

Here's the recipe as adapted from All Recipes:

Ingredients

  • 1 cup chocolate cookie crumbs (I used about 17 Oreos)
  • 3 tablespoons white sugar (Didn't use this)
  • 1/4 cup butter, melted
  • 1 (10 ounce) package frozen raspberries
  • 2 tablespoons white sugar or sugar substitute
  • 2 teaspoons cornstarch
  • 1/2 cup water
  • 2 cups white chocolate chips
  • 1/2 cup half-and-half cream (Didn't have this on hand, so I used 1/2 cup milk with a little melted butter)
  • 3 (8 ounce) packages cream cheese, softened
  • 1/2 cup white sugar or sugar substitute
  • 3 eggs
  • 1 teaspoon vanilla extract

Directions

  1. In a medium bowl, mix together cookie crumbs, 3 tablespoons sugar, and melted butter. Press mixture into the bottom of a 9 inch springform pan.
  2. In a saucepan, combine raspberries, 2 tablespoons sugar, cornstarch, and water. Bring to boil, and continue boiling 5 minutes, or until sauce is thick. Strain sauce through a mesh strainer to remove seeds.
  3. Preheat oven to 325 degrees F (165 degrees C). In a metal bowl over a pan of simmering water, melt white chocolate chips with half-and-half, stirring occasionally until smooth.
  4. In a large bowl, mix together cream cheese and 1/2 cup sugar until smooth. Beat in eggs one at a time. Blend in vanilla and melted white chocolate. Pour half of batter over crust. Spoon 3 tablespoons raspberry sauce over batter. Pour remaining cheesecake batter into pan, and again spoon 3 tablespoons raspberry sauce over the top. Swirl batter with the tip of a knife to create a marbled effect.
  5. Bake for 55 to 60 minutes, or until filling is set. Cool, cover with plastic wrap, and refrigerate for 8 hours before removing from pan. Serve with remaining raspberry sauce.

Thursday, April 8, 2010

Lemon Heaven~

Thanks to my aunt for providing me a steady supply of lemons from her lemon tree, I have been baking up a frenzy these days. Lemon tarts, lemon cheesecakes, lemon cream. I looked at all my baking pans today and noticed that I haven't used my bundt pan in awhile, so lemon bundt cake it is!

This lemon cake is the most lemony-flavored cake I've ever tasted. And if you like lemons as much as I do, drop what you're doing and make this cake...RIGHT NOW! Not only does the cake contain lemons galore, you pour lemony syrup on top, followed by a generous amount of lemon icing to finish this heavenly treat. The cake itself is actually sugar-free because I substituted Splenda for the sugar...so eat away!

Here's my adaptation of Ina Garten's Lemon Cake using a bundt pan instead:

I love sifting!


The glaze on top. I didn't use as much sugar so it was kinda watery, but delicious!


My little baby out of the oven, ready for its lemon syrup bath.


Finishing touch...lemon glaze. I like that the icing wasn't think, but very light.


Final product: Moist, lemony, cake with a pound cake-like consistency, although it's not as dense as normal pound cakes.


Ingredients:
2 sticks unsalted butter, at room temperature
2 1/2 cups sugar (Splenda is OK for you diabetics)
4 extra-large eggs, at room temperature
1/3 cup grated lemon zest (6 to 8 large lemons)
3 cups all-purpose flour
1/2 teaspoon baking powder
1/2 teaspoon baking soda
1 teaspoon kosher salt
3/4 cup plus 3 1/2 tablespoons freshly squeezed lemon juice
3/4 cup buttermilk, at room temperature
1 teaspoon vanilla extract
2 cups confectioners’ sugar, sifted

1. Heat oven to 350 degrees. Grease and flour one bundt pan
2. Cream butter and 2 cups sugar in the bowl of an electric mixer fitted with a paddle attachment for about 5 minutes, or until light and fluffy. Mixing at medium speed, add eggs, one at a time, and lemon zest.
3. Sift together flour, baking powder, baking soda and salt in a bowl. In another bowl, combine 1/4 cup lemon juice, buttermilk and vanilla. Add flour and buttermilk mixtures alternately to butter and sugar mixture, beginning and ending with flour. Divide batter evenly between loaf pans or one bundt pan, smooth tops, and bake for ~45 minutes, until a cake tester (or toothpick) comes out clean.
4. Combine 1/2 cup sugar with 1/2 cup lemon juice in a small saucepan, and cook over low heat until sugar dissolves.
5. When cake is done, carefully Invert it onto a rack set over a tray, and spoon lemon syrup over it. Let cakes cool completely.
6. For glaze, combine confectioners’ sugar and remaining 3 1/2 tablespoons lemon juice in a bowl, mixing with a whisk until smooth. Pour over top of cakes, and allow glaze to drizzle down the sides.

Wednesday, April 7, 2010

Strawberry season is here!


I get so excited when my local strawberry farms start selling big, juicy, SWEET strawberries. A good strawberry can make any day brighter. Strawberries aren't as versatile as many other fruits, but it seems there is one perfect reason why the strawberry exists in my book...fresh strawberry pie. Add some bananas and banana cream to it and you've got yourself a perfect wedding of flavors.

I wanted to make a pie, but for some reason, I couldn't find my pie pan. Maybe I don't have one in my house. Who knows with all the pans I have purchased over the past few years. Anyways, I decided to make a strawberry banana cream TART to welcome spring.


I used Ellie Kreiger's recipe for Banana Cream Pie, then added strawberries with glaze on top. I didn't use the graham cracker crust, but used a pie crust instead.

Ingredients

  • Cooking spray
  • 12 graham cracker squares (6 full sheets)
  • 2 tablespoons butter, softened
  • 1 1/2 teaspoons unflavored gelatin
  • 3 tablespoons boiling water
  • 1/3 cup, plus 1/2 teaspoon sugar
  • 3 tablespoons all-purpose flour
  • 2 egg yolks
  • 1 1/2 cups 1 percent lowfat milk
  • 1 teaspoon vanilla extract
  • 2 cups sliced banana (3 medium bananas)
  • 1/4 cup whipping cream
  • 1/2 teaspoon sugar

Directions

Preheat the oven to 350 degrees F.

Spray a 9-inch pie plate with cooking spray. In a food processor, process graham crackers until finely ground. Add butter and 1 tablespoon of water, and process until the crumb clumps together. Press crumb mixture into bottom of pie plate and about 1/2-inch up the sides. Bake in the oven for 10 minutes, then let cool.

In the meantime, make the filling. Put the gelatin in a small bowl; add 3 tablespoons of boiling water and stir until gelatin is dissolved. In a medium saucepan, whisk together 1/3 cup of sugar and the flour. In a medium bowl lightly beat the milk and eggs together. Add the egg and milk mixture to the saucepan and whisk so the flour and sugar dissolve. Cook over a medium heat, stirring constantly, for 10 minutes, until mixture comes to a boil and has thickened. Stir in the vanilla extract and gelatin. Set aside to cool slightly.

Arrange the sliced bananas on the graham cracker crust and pour the pudding on top. Place in the refrigerator until the pudding has set, about 3 hours.

Whip the cream with an electric beater. When it is about halfway done, add 1/2 teaspoon of sugar, then continue whipping until fully whipped. Put the whipped cream in a plastic bag, concentrating it in 1 corner of the bag. Snip that corner off the bag and squeeze the whipped cream out of the bag in a decorative pattern around the pie.

When life gives you a lemon...make lemon cheesecake


I love love LOVE lemons and everything containing lemons! Um...except for lemon skittles. Springtime always makes me see everything in yellow. I want to wear yellow clothes (though I don't have any), see yellow flowers, but most importantly, eat yellow things.

Can anything be better than mixing lemons with cheesecake? I can't think of anything. I bet you can't either. So here is a low-fat, almost sugar-free lemon cheesecake for those who love sweets as much as I do, but can't afford to eat it in its full-fat, full-sugary goodness. I promise, you can't even tell it's almost healthy. :)


Recipe adapted from Paula Deen's "Joanne's Almost Fat-free Lemon Cheesecake" recipe! Amazing, huh? Who knew that "low-fat" was in her vocabulary.

Crust:

  • Cooking spray
  • 1 3/4 cups fat-free vanilla wafer cookie crumbs, or any fat-free cookie crumbs of your choice
  • 1/4 cup unsalted butter, melted
(I actually just used the crust recipe from my pumpkin cheesecake recipe because I didn't have vanilla wafers on hand. Use splenda!)

Filling:

  • 3 (8-ounce) packages fat-free cream cheese
  • 1 cup fat-free sour cream
  • 2 cups sugar or sugar substitute (recommended: Splenda)
  • 3 large eggs or 3/4 cup egg substitute
  • 2 teaspoons lemon zest
  • 2 tablespoons lemon juice

Lemon Curd:

  • 1 1/2 teaspoons lemon zest
  • 6 tablespoons lemon juice
  • 1 large egg, plus 1 large egg yolk
  • 1/2 cup sugar or sugar substitute (recommended: Splenda)
  • 2 tablespoons unsalted butter, cut into bits, or any fat-free butter substitute

Directions

Make crust: Preheat oven to 325 degrees F.

Lightly spray a (9-inch) springform pan with cooking spray. Mix crumbs and melted butter in a bowl. Press crumb mixture onto bottom and 1 1/2 inches up side of pan. Bake for 8 to 10 minutes or until edges are lightly golden and crust is set. Cool on rack.

Make filling: In large bowl with electric mixer on medium-high, beat cream cheese and sour cream for 2 to 3 minutes until fluffy. Gradually beat in sugar or sugar substitute. Beat in eggs, 1 at a time, just until incorporated. Beat in zest and juice. Pour into crust. Bake for 1 hour to 1 hour, 15 minutes, or until center is almost set, but still slightly jiggly. (Do not overbake, as it will firm as it cools). Let cool completely.

Make lemon curd: In the top of a double boiler, combine lemon zest, lemon juice, egg, egg yolk, and sugar or sugar substitute over gently simmering water. Whisk until hot and frothy, about 5 minutes. Gradually whisk in butter and continue whisking for 7 minutes or until thickened and coats back of spoon. Remove from heat and cool for 30 minutes.

Run a thin blade around the edge of the springform pan and remove sides. Transfer to a serving plate. Spread lemon curd over top. Let stand at room temperature for 30 minutes. Garnish with raspberries and zest, if desired. Cool cheesecake in refrigerator several hours or overnight before serving.