Sunday, August 7, 2011

Lemon Pound Cake


The best thing I like about this recipe is that it is so simple. It's a true "no fuss, no muss" type of loaf. And what's even better, you probably already have all the ingredients in your kitchen! The only advice I can give for those of you who wish to make this lemon cake is to watch how much you mix the batter. You don't want to over mix as this will cause the cake to become tough. Mix just until the ingredients are incorporated together. Then stop. Just stop. Leave it alone. It's okay if there are lumps. The final cake will be soft and moist. I really like that this cake is more of a mix between pound cake (dense) and normal cake (fluffy). Delicious.

So here is the recipe for Easy Lemon Pound Cake:


Ingredients:


Directions:


  1. Mix together 1 cup sugar and butter.

    Add eggs and 2 tablespoons of lemon juice; mix well. (I also added the zest of 1 lemon)
  2. Add salt, flour, and baking powder to mixture.
  3. Add milk and stir until it becomes a smooth batter. (Don't overmix!)
  4. Bake at 325°F in a well greased loaf pan for 1 hour,or until golden brown.
  5. Mix 1/3 cup lemon juice and 1/4 cup sugar.
  6. Use a toothpick to make holes in top of cake and drizzle lemon juice and sugar mixture over the top of the cake when removed from the oven.
  7. Serve warm or cool. 


Friday, July 22, 2011

The Real Deal Banana Bread


This banana bread recipe caused an uproar in my blogging world. Why? Because I found a healthy banana bread that is moist, fluffy, and banana-y. I even went back to a previous post on a different recipe and DELETED it forever from my blog! (Whaaaa?) This bread is from All Recipes' website. It's healthier and softer
than any other recipe I've tried, which is amazing considering it's whole wheat. And you know what's so great about banana bread? You can add other ingredients like chocolate chips or nuts to it, and it won't change the consistency of the bread itself.

You start with some ripe bananas.


Here's a trick I learned from someone, somewhere, I just don't remember where. When measuring honey in a normal measuring cup, it's best to spray some oil into the cup before you add the honey. This will reduce the amount of honey that gets stuck to the cup rather than going into your bowl. Genius, I know.


Mix all the ingredients just until combined. Too much stirring will cause the bread to lose its soft quality.


So here it is. The only banana bread I will ever make in my future from All Recipes:

Ingredients

  • 1/3 cup vegetable oil
  • 1/2 cup honey
  • 1 teaspoon vanilla extract
  • 2 eggs
  • 1 cup mashed bananas
  • 1 3/4 cups whole wheat flour
  • 1/2 teaspoon salt
  • 1 teaspoon baking soda
  • 1/4 cup hot water
  • 1/2 cup chopped walnuts

Directions

  1. Preheat oven to 325 degrees F (165 degrees C).
  2. In a large bowl, beat oil and honey together. Add eggs, and mix well. Stir in bananas and vanilla. Stir in flour and salt. Add baking soda to hot water, stir to mix, and then add to batter. Blend in chopped nuts. Spread batter into a greased 9x5 inch loaf pan.
  3. Bake for 55 to 60 minutes. Cool on wire rack for 1/2 hour before slicing.

*I added chocolate chips to only half of the loaf because my dad and I love them, but my mom likes it simple. Add whatever you wish!

Tuesday, April 12, 2011

Coffee Macarons with Chocolate Filling


Need a little kick to upstart your morning? These little macarons will brighten up any sad day. It sure brightened mine. Here's to one of the better recipes for macarons that I've done.

This macaron is light with a wonderful coffee flavor and aroma. When adding the filling, just add a dab of chocolate ganache in between the two shells because you really want the coffee flavor to shine, not the chocolate.

The recipe says to use aged egg whites, but who has time to age egg whites when you need a macaron NOW? So it goes to say that I never age my egg whites, yet they still come out pretty good. Do it if you like, but it won't kill the macarons if you don't.

There aren't very many steps or ingredients that go into making a macaron, but every step requires great care and patience. So show it some love, and it'll reward you in return. First off, we start with the chocolate ganache. In a pot, pour the heavy cream until it's just bubbling at the edges.

Take it off the heat and add the chocolate. .

Stir until it becomes nice and smooth. Set aside to cool and thicken.

When making a macaron, the best results occur when you use a scale to measure the ingredients. A scale allows you to be precise every time. You can get a cheap one from Target like I did. Measure out all the ingredients before assembling. You'll thank me later.

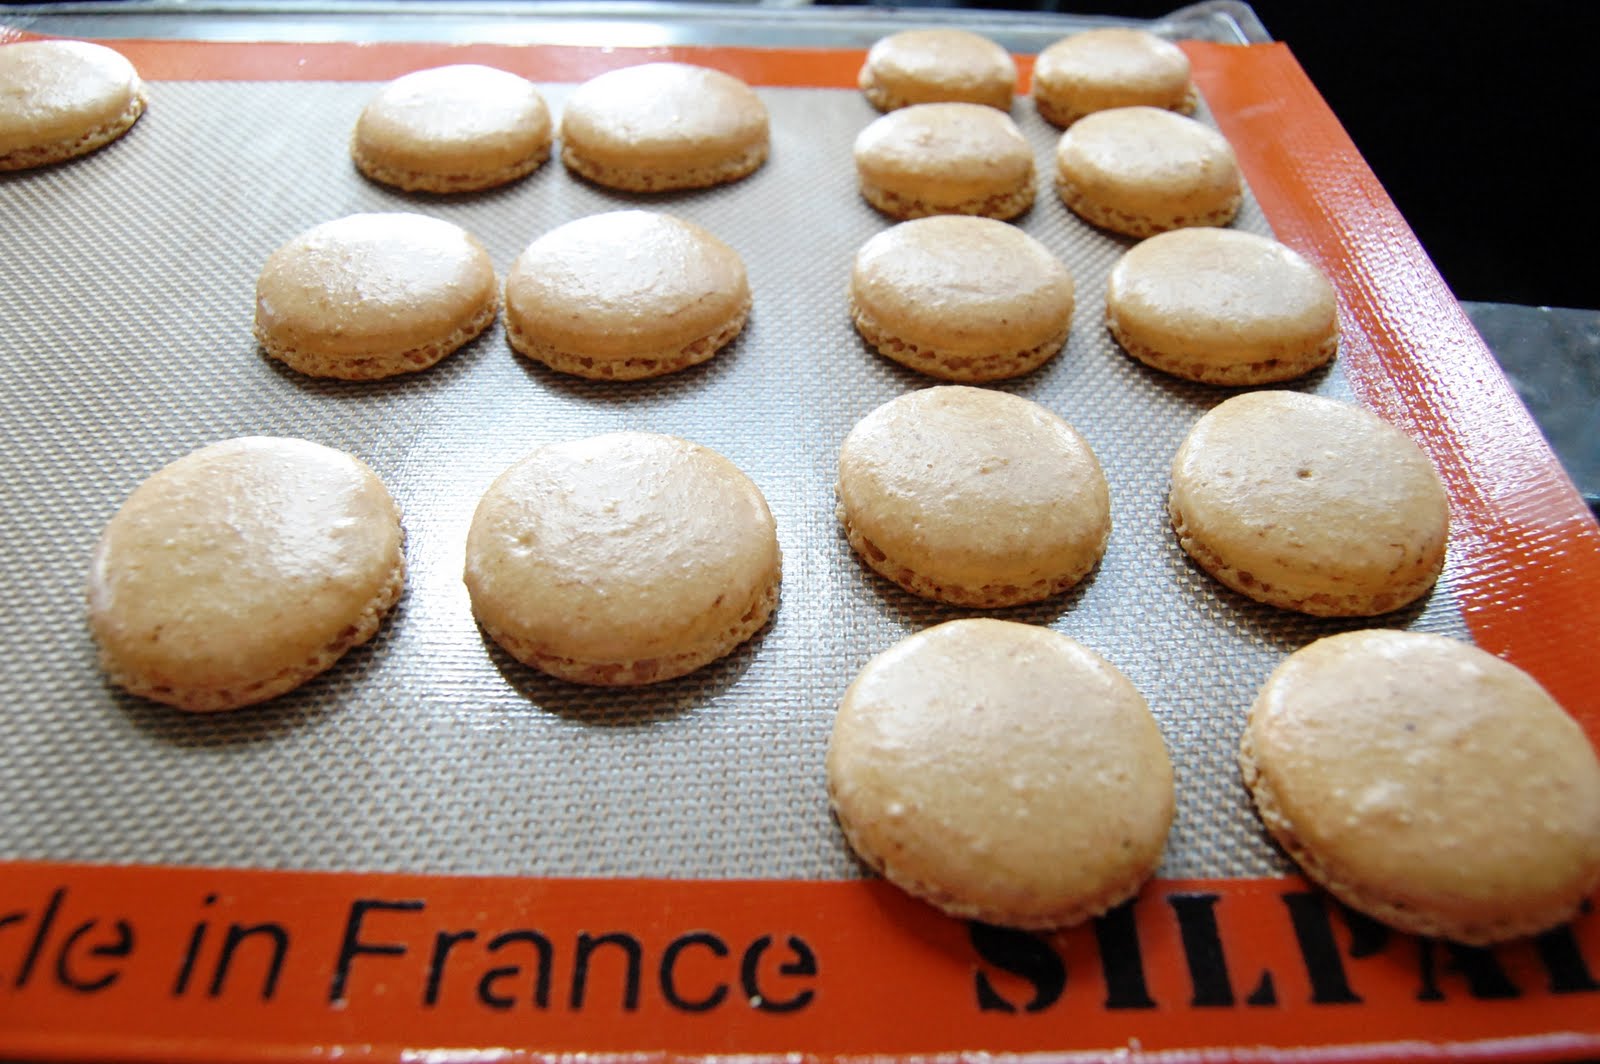
Another tool for any baker wanting to make macarons: the silpat.

For the macaron shells, beat the egg whites until foamy. Add the caster sugar gradually until the whites become stiff peaks. It should be glossy and incredibly thick. In a separate bowl, combine the ground almonds, powdered sugar, and espresso powder. Add half the dry mixture to the egg whites and fold gently.

Pour in the rest of the dry mixture into the eggs whites and continue folding until the mixture is JUST combined. It should be thick like "magma". Pipe out little circles onto the silpat and bake in the oven at 270F for about 18 minutes. I learned a little secret this time, use the convection oven setting if you have it. It made a world of a difference!


Allow the shells to cool before you try to remove them. Let them cool completely before you add the ganache in the middle. Enjoy!

Coffee Macarons with Chocolate Ganache by Italian Food Forever:


Ingredients:
For The Shells

90g Egg Whites (About 3) At Room Temperature And Aged For 3 Days
30g Caster Sugar
200g Powdered Sugar
110g Finely Ground Almonds
1 1/2 Teaspoons Instant Espresso Powder (Additional for Topping If Desired)


Directions:

1. Combine the almond flour, powdered sugar, and espresso powder.

2. In a stand mixer fitted with a whisk, beat the egg whites until foamy. Slowly begin to add the granulated sugar until you have created a glossy meringue. Add the almond mixture to the meringues all at once, and quickly fold to blend and break up some of the air. Continue to slowly mix until the almonds are incorporated into the meringues and the mixture resembles lava. It should not take more than 50 strokes to accomplish this.

3. I find it best to test the meringue at this time but dropping a small spoonful onto some parchment paper. The mixture should smooth out, but not flatten completely and you shouldn't have a peak. If you have a peak fold the mixture a few more times. If the mixture has flattened completely you might have over mixed and removed too much air.

4. Once you have the right consistency, fill a pastry bag with a plain tip with the mixture. Carefully pipe circles 1in. circles 2 in. apart onto a silpat or parchment paper. In my experience, I've noticed that silpats produce better shells than parchment paper. 

4. Preheat the oven to 270 degrees F on the CONVECT setting. Bake the macarons for 15 to 20 minutes depending on how large you piped them. While baking they should rise with airy feet developing. Once baked remove from the oven and cool for 10 minutes. Carefully remove from the parchment using a small metal spatula.

Chocolate ganache
INGREDIENTS:
9 ounces bittersweet chocolate, chopped
1 cup heavy cream

DIRECTIONS:
1.Place the chocolate into a medium bowl. Heat the cream in a small sauce pan over medium heat. Bring just to a boil, watching very carefully because if it boils for a few seconds, it will boil out of the pot. When the cream has come to a boil, pour over the chopped chocolate, and whisk until smooth. 
2.Allow the ganache to cool and thicken before filling each macaron shell. Sometimes, I'll put it in the fridge for 10 minutes to help it cool faster.

Monday, February 21, 2011

Meyers Lemon Bundt Cake


Last week, I won a new Kitchenaid Artisan Stand Mixer in an online auction for $2.75. Yup, you read that right - $2.75. With shipping and handling, the total came out to a whopping $30. With these stand mixers retailing at $300, I was beside myself with joy and vowed to make everyone I knew some type of baked good with all the money I saved. Well, the stand mixer came in the mail. It was quite an adventure opening up the box, within a box, within a box. Pretty intense packaging if you ask me, but I don't mind as long as it keeps my baby safe!

Box 1

Box 2

At last! The last box!

It's just so beautiful...and NEW!
It just so happens that my wonderful aunt supplies me with a steady supply of Meyers lemons. Meyers lemons, if you don't know, are a little different from regular lemons. They are slightly sweeter and have an orange tint to the peel making them perfect for baking. I was recently browsing through a few blogs and found this mouth-watering Meyer Lemon Bundt Cake recipe that I wanted to try. So here we go!

Meyers Lemons

Here are the lemons graciously provided by my aunt...beautiful, aren't they?

The ingredients that you'll need.


Grease and flour a bundt pan.

Lemon juice...

Meyer Lemon Bundt Cake by Baking Bites
3 cups all purpose flour
1 tsp baking powder
1/2 tsp baking soda
1/2 tsp salt
3/4 cup butter, room temperature
1 1/2 cups sugar
3 large eggs
2 tbsp Meyer lemon zest
1/2 cup Meyer lemon juice
1/2 cup buttermilk

2 tbsp Meyer lemon juice
1 cup confectioners sugar

Preheat oven to 350F. Grease and flour a 10 or 12 cup bundt pan. In a medium bowl, whisk together flour, baking powder, baking soda and salt. In a large bowl, cream together butter and sugar until fluffy. Beat in eggs, one at a time, followed by lemon zest. Stir 1/3 of the flour mixture into the butter mixture, followed by the Meyer lemon juice. Add in additional 1/3 of the flour mixture, followed by the buttermilk. Stir in all remaining flour, mixing only until no streaks of flour remain visible. Pour into prepared pan. Bake for 40-45 minutes, until a toothpick inserted into the center of the cake comes out clean or with only a few moist crumbs attached. Let cake rest in pan for 15 minutes, then turn out on to a wire rack to cool completely.

For the glaze, whisk together lemon juice and confectioners’ sugar in a small bowl. Drizzle over cooled cake.

Serves 12-14

Monday, January 17, 2011

About-face!


Drill Sergeant: Gump! What's your sole purpose in this Army?
Forrest: To do whatever you tell me, Drill Sergeant!

I love that movie and I love the acting of Tom Hanks as Forrest, Forrest Gump. Another good friend left for the army last week and in honor of him leaving, I baked a special cake. It is a little boy's dream come true - an army tank! Although my friend is not a little boy, I hope he liked it anyways.

It was really fun making this cake, and I can see how cake decorators must have so much fun designing their creations. I used 2 box cakes for the whole thing, chocolate and yellow. Originally, I wanted just the cupcakes to be chocolate, but I had so much chocolate batter left over that I just swirled it into the yellow cake. So first things first, the tank....

Bake the cake according to the directions on the box using a 13x9 pan. You're going to cut the final COOLED cake about 1/3 of the way in. Look below.


Next, you're going to cut the smaller 1/3 section into a square so that it can be places on top of the bigger piece of cake. You're going to need to cut the bottom cake so that it looks like the bottom part of a tank. Just play around with it. Now, you need to frost the bottom section first. Somehow, I played around with my food coloring and vanilla frosting to get this dirt colored/greenish looking frosting that reminded me of the army colors.


Frost the bigger cake, then place the smaller 1/3 section on top and frost. Now's the fun part. Grab a few oreos and split them in half. These are going to be the "wheels" of the tank. I bought some pirouettes, cut them into thirds, and placed them around the wheels. You can pretty much use any treat/cookie as long as it looks the part. Have fun!

Monday, December 13, 2010

Pumpkin Bundt Cake


When my friend first sent me this recipe, I started drooling. This bundt cake screamed to be made. I could almost taste the pumpkin cake from my laptop screen. So, what else could I do but make it?

The directions are pretty simple, and it uses ingredients that you can find around your house, minus the pumpkin puree. And unlike many other bundt cakes, this one only uses a stick of butter. Phew! See? A cake can be good with less butter! The cake was moist, fluffy, and had a good balance of pumpkin flavor. The cream cheese icing was a good complement to the spice of the cake, although I had to adapt it a little because I didn't have any milk on hand. So instead, I used water. Other than that, just follow the directions to the T and you should have no problems.


close-up shot.


Pumpkin Bundt Cake by Baking Bites:
2 3/4 cups all purpose flour
2 tsp baking powder
1/2 tsp baking soda
1/2 tsp salt
2 tsp pumpkin pie spice
1/2 cup butter, room temperature
1 cup sugar
1/2 brown sugar
3 large eggs
2 tsp vanilla extract
1/2 cup vegetable oil
1/2 cup buttermilk
1 1/4 cups pumpkin puree

Preheat oven to 350F. Lightly grease and flour a 10-inch bundt pan.
In a medium bowl, whisk together flour, baking powder, baking soda, salt and pumpkin pie spice.
In a large bowl, cream together butter and sugars until light and fluffy. Beat in eggs, one at a time, followed by the vegetable oil and vanilla extract.
Whisk together buttermilk and pumpkin puree in a small bowl or measuring cup.
Stir about 1/3 of the flour mixture into the butter mixture, followed by half of the pumpkin mix. Stir in another 1/3 of the flour mixture, followed by the remaining pumpkin and the remaining flour. Mix only until ingredients are just combined and no streaks of dry ingredients remain visible. Pour into prepared pan.
Bake for about 45 min, or until a toothpick inserted into the center of the cake comes out clean and the top springs back when lightly touched.
Cool in the pan for 10 minutes, then turn out onto a wire rack to cool completely.

Makes 1 bundt cake; serves 10-12

Vanilla Cream Cheese Glaze
2 oz cream cheese, room temperature
2 tbsp milk
1/2 cup confectioners’ sugar
1 tsp vanilla extract

In a small bowl, beat all ingredients together until very smooth. Drizzle over cooled cake.

Tuesday, November 9, 2010

Pumpkin Bread with Chocolate Chips


It finally feels like fall, doesn't it? There's a little chill in the morning that makes me want to drive to the nearest Coffee Bean and order a hot cup of coffee. The trees in my neighborhood are starting to turn orange and the air smells crisp. And so begins the month of reflecting on life's blessings.

Anyways, onward to the goods! There is no better way to welcome fall than to bake something with pumpkin in it. Am I right, or am I right? This pumpkin loaf is moist, pumpkin-y, and pretty good if I do say so myself. I added chocolate chips to the batter because, as you know, chocolate makes everything better...and I do mean EVERYTHING.

The recipe is from food.com:

Ingredients:

Yield: 2 loaves

Directions:

Prep Time: 10 mins

Total Time: 1 1/4 hr

  1. Preheat oven to 350 degrees and grease 2 loaf pans.
  2. Mix together well the pumpkin, sugar, oil and eggs.
  3. Add flour, baking powder, baking soda, cinnamon, ginger and raisins, and mix well.
  4. Pour into loaf pans and bake for 60-65 minutes or until inserted knife comes out clean.